



If you want to compare essential oils by smell, scent strips for essential oils give you a simple way to evaluate each aroma without relying only on the first smell from the bottle. Apply a consistent amount to each strip, label the samples, smell them at the same distance and time intervals, and record what you notice. This makes your comparisons more consistent and helps you notice how an aroma changes as it develops.
Whether you are choosing between two similar citrus oils, exploring individual aromas for a blend, or simply learning how to smell essential oils, a repeatable method can make scent evaluation much easier.
What Are Scent Strips for Essential Oils?
Scent strips are narrow pieces of absorbent paper designed for evaluating aromas. You may also see them called fragrance test strips, perfume blotter strips, scent strips, or fragrance blotters. They provide a convenient surface for applying a small amount of an aromatic material and smelling it separately from the bottle.
Unlike smelling directly from an open bottle, a strip gives the aroma room to develop as it interacts with the air. This can make it easier to notice different aspects of an essential oil's aroma over time.
They are especially useful when you want to:
-
Compare two or more essential oils
-
Record your first impression and later impressions
-
Explore individual oils before creating a blend
-
Practice identifying different aroma characteristics
-
Compare similar-smelling oils side by side
-
Keep written notes about your scent evaluations
What You Need to Test Essential Oils by Smell
You do not need a complicated setup for testing essential oils by smell.
Start with:
-
Clean scent or blotter strips
-
The essential oils you want to compare
-
A pen or pencil
-
A notebook or scent journal
-
A clean, well-ventilated space
Keep the testing area as free from competing aromas as possible. Strong perfumes, scented candles, food aromas, incense, air fresheners, and cleaning products can make comparisons harder.
For a focused session, start with two to four oils rather than testing a large collection at once. Giving your nose fewer scents to distinguish can make your notes more useful.
How to Test Essential Oils on Scent Strips
The key to learning how to test essential oils on scent strips is consistency. Try to keep the amount of oil, strip type, testing distance, and evaluation intervals similar for every sample.
1. Prepare a Neutral Testing Area
Choose a well-ventilated space without strong background aromas.
Avoid testing immediately after using perfume or strongly scented personal-care products. You want the essential oil to be the main aroma you notice.
Place your strips on a clean surface where they will not touch one another.
2. Label Each Strip Before Applying the Oil
Write the essential oil name on the dry end of each strip before you begin.
For a more objective comparison, you can also use simple codes such as A, B, and C instead of the oil names.
This creates a basic blind-testing method. You can smell the samples first and reveal their names afterward, reducing the chance that your expectations about an oil influence your description.
3. Apply the Same Amount to Each Strip
Consistency matters more than chasing a perfect universal drop count.
Apply the same amount of each essential oil to the same area of each strip. If you use one drop for the first sample, use one drop for the others.
Some scent-strip methods use a small amount applied to the strip and allow it to sit briefly before evaluation.
The important point is to keep your application method consistent when comparing oils.
4. Give the Strip a Moment Before Smelling
Do not immediately press the freshly prepared strip against your nose.
Allow it to sit briefly, then bring it toward your nose. Different testing guides recommend a short waiting period before the first evaluation so the initial aroma has a chance to settle.
You can use a consistent interval such as 10 seconds for your comparison method.
The exact timing matters less than using the same timing for every sample.
5. Smell the Strip From a Short Distance
Hold the strip a few inches away from your nose and take a gentle sniff.
You do not need to take a deep inhale.
Instead, pay attention to your immediate impression:
-
Is it bright or soft?
-
Fresh or warm?
-
Sweet or dry?
-
Light or intense?
-
Fruity, floral, woody, earthy, spicy, herbal, or resinous?
-
Does one aroma remind you of another familiar scent?
Using the same distance for every sample makes your comparison more consistent. Essential-oil scent-strip guides commonly recommend holding the strip away from the nose rather than pressing it directly against your nostrils.
6. Record Your First Impression
Write down a few words immediately after smelling each strip.
Do not worry about finding the "perfect" fragrance vocabulary.
For example:
Sweet Orange
-
Bright
-
Juicy
-
Sweet
-
Fresh
Mandarin
-
Soft
-
Sweet
-
Fruity
-
Mellow
Short descriptions are often more useful than trying to write a long paragraph about every sample.
7. Revisit the Strips Later
This is the step that turns a quick sniff into a repeatable comparison method.
Resubmit the strips and smell them again at intervals as previously mentioned.
For example:
-
Initial: First impression
-
After 10 minutes: What's different after 10 minutes?
-
After 30 minutes: Which characteristics remain?
-
Later: What aroma is still noticeable?
Do not change the timing for different oils. If you evaluate one oil after 10 minutes, evaluate the others at the same point.
Scent-strip guidance commonly recommends recording application times and revisiting strips at different intervals to observe how the aroma develops.
How to Compare Essential Oils at Different Stages
A useful way to organize your observations is to divide the evaluation into stages.
First Impression
This is what you notice immediately or shortly after applying the oil.
Look for its most noticeable characteristics.
For a citrus essential oil, for example, you might describe the opening as:
-
Bright
-
Juicy
-
Zesty
-
Sweet
-
Fresh
Mid-Stage Aroma
After some time has passed, smell the strip again.
Ask:
What changed?
Maybe the initial brightness has softened. Perhaps a warmer, sweeter, greener, or more complex characteristic has become easier to notice.
Later Aroma
Return to the strip again later.
Instead of asking only, "Does it still smell strong?" ask:
What does it smell like now?
This distinction is important because intensity and aroma character are not the same thing.
An aroma may become softer while still retaining recognizable characteristics.
How to Score Essential Oils on Scent Strips
If you're using multiple oils to compare to each other, then something like a one to five system is really helpful to write down on your note.
Try rating each oil from 1 to 5 for:
Intensity: How noticeable is the aroma?
Rate each oil on a scale from 1 to 5 for:
Intensity: How noticeable is the aroma?
Aroma character: How clearly can you describe its main characteristics?
Development: How interesting is the 'development' from the first impression to the second?
Overall preference: How much do you personally enjoy the aroma?
You can also add a free-form notes section.
Essential Oil Scent Strip Comparison Template
OilFirst ImpressionAroma CharacterIntensity 1–5Later AromaOverall Score
Oil A Bright, fresh Citrusy, sweet 4 Softer, warm 4
Oil B Sweet, mellow Fruity, soft 3 Smooth, light 5
The numbers are not laboratory measurements. They simply give you a consistent framework for comparing your own observations.
How to Compare Two Essential Oils Side by Side
When two oils smell similar, test them using exactly the same process.
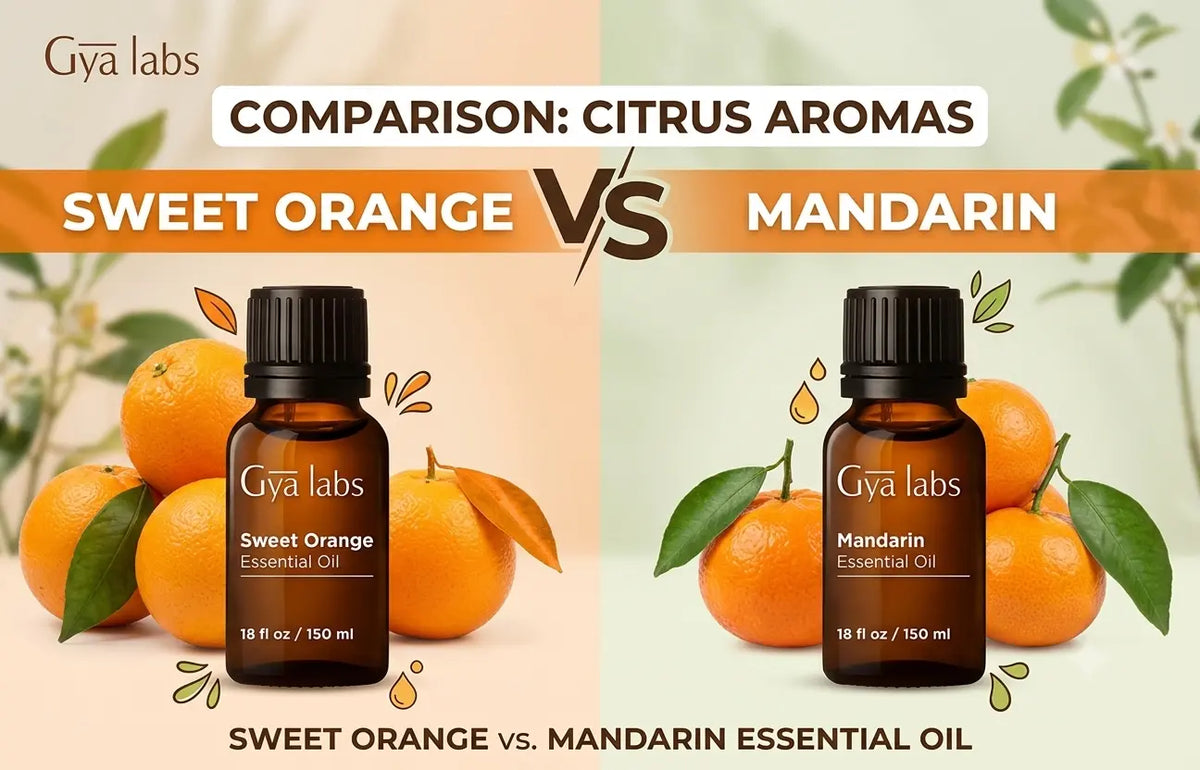
For example, if you are comparing Sweet Orange and Mandarin essential oils, prepare one strip for each.
Apply the same amount to both strips.
Then evaluate:
-
First impression
-
Aroma character
-
Intensity
-
Changes over time
-
Overall preference
It's better to stop asking which oil is 'better' and get more specific:
Which one smells sweeter?
Which one feels brighter?
Which one is softer?
Which one keeps its original character longer?
Which one would I choose for the type of aroma I want?
These questions produce more useful comparisons than simply choosing a favorite after one sniff.
Common Mistakes When Testing Essential Oils by Smell
Even a simple scent test can become inconsistent if you change the testing conditions between samples.
Smelling Directly From the Bottle
Smelling directly from the bottle can be useful for a quick introduction, but it is less controlled for side-by-side comparisons.
Using strips gives you a consistent testing surface and makes it easier to label and revisit samples.
Using Different Amounts
A larger amount will naturally create a stronger impression.
If one strip has considerably more oil than another, your comparison may tell you more about quantity than aroma.
Testing Too Many Oils
After several samples, distinguishing subtle differences can become harder.
Take a break between groups rather than forcing yourself through a long list.
Smelling Only Once
The first impression is useful, but it is only one part of the evaluation.
Return to your strips later and record what has changed.
Letting Strips Touch
Keep your strips separated. Contact between freshly prepared strips can transfer aroma and make samples harder to distinguish.
Forgetting to Label the Strips
It is surprisingly easy to forget which strip is which.
Label before testing rather than trying to identify everything afterward.
How to Use Scent Strips for Essential Oil Blending
Scent strips can also help you explore possible combinations before committing to a larger blend.
Start by testing individual oils separately.
Once you understand each aroma, place the corresponding strips next to one another and evaluate how the scents work together.
Further experiment by varying the relative proportions of each strip. Blotter-strip techniques are often employed to contrast various single scents and evaluate possible combinations before preparing a final blended product.
For example, instead of immediately creating a blend, compare:
-
1 part Oil A + 1 part Oil B
-
2 parts Oil A + 1 part Oil B
-
1 part Oil A + 2 parts Oil B
Note down which combo provides the fragrance balance you want.
This is particularly useful when exploring an essential oil blend because you can make adjustments before committing more materials to the formula.
Scent Strips vs. Smelling Essential Oils Directly From the Bottle
Both methods can be useful, but they serve different purposes.
Bottle smelling is quick and convenient when you simply want an immediate impression of an oil.
Scent-strip testing is helpful if you're interested in doing some apples-to-apples comparisons, noting your impressions, or to revisit something after the fact.
One of the main reasons blotter strips are popular is that they are a neutral surface and the scent can be judged away from the bottle.
If you prefer to compare than merely push out a snappy handshake, strips are probably the more obvious option.
Safety Tips When Testing Essential Oils
Scent strips help keep concentrated essential oils away from direct skin contact during aroma evaluation.
Keep bottles closed when they are not being used and work in a well-ventilated area. Avoid ingesting essential oils or getting concentrated oils into your eyes.
Keep essential oils and used strips away from children and pets.
Most importantly, remember that smelling an oil on a strip is an aroma evaluation method, not a test of whether an oil is suitable for topical use. Always follow the specific usage and dilution guidance for the essential oil and application you are considering.
Final Thoughts
Learning how to use scent strips is simple. The real benefit is in being able to follow the same method.
Name your strips, always use the same quantity, always smell from the same distance, always record your initial impression, and return at set intervals.
Next time you do these things a few times it will become second nature and the scent-strip test won't be just a sniff, it will be an experience that can help you compare your essential oils, see how their aroma profiles change and discover different combinations of them with a little bit more consistency.